
SleekLens “Through the Woods” presets Review
I was recently contacted by the company Sleeklens asking if I would be interested in reviewing their Lightroom or photoshop presets. I though it was some kind of junk mail and didn’t respond until two weeks later they reached back out and asked if I was still interested in writing a review. I’m always looking for ways to improve my photo editing. I spend a lot of time editing each and every photo I share, though I don’t use presets. I’ve downloaded exactly two, ever! But I thought hey why not?! I agreed to use and write this review and they sent me their Lightroom presets and brushes from their “Into the Woods” collection. I was also sent instructions on how to install the presets and brushes.
Installation
To install the brushes I was given a .pdf file that included instructions for both PC and Mac. Screenshots are provided for the windows install. The Mac install is provided in text with no screenshots. I use a Mac and installation was dead simple for the brushes. To install the presets a link to their YouTube video was included. It’s around a 3 minute video and steps through the entire install, which again is very simple. Installation took me all of 10 minutes.
First Impressions
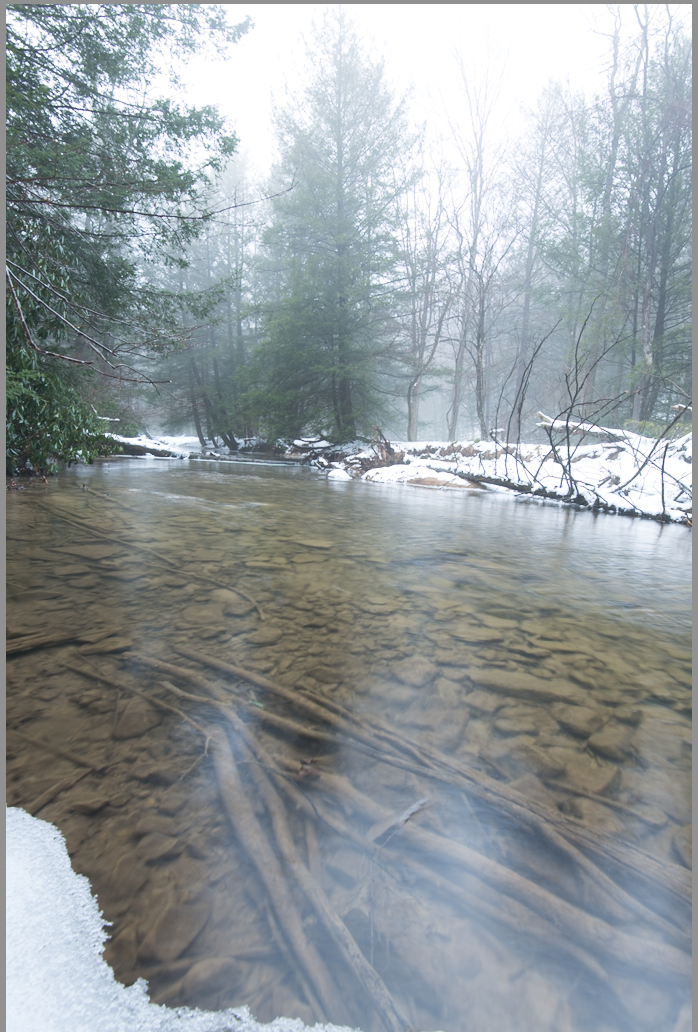
After I got everything together I wanted to quickly play with some of the brush presets. The adjustment brush is one tool that I don’t use very often in Lightroom. So after getting acquainted with it, I found the loaded brushes. I picked a really simple photo of a stream with some fog in the background. This was taken on a recent adventure and wasn’t quite my favorite because of the harsh reflections in the foreground that my polarizer didn’t filter. I found a brush called “ Water Definition” I applied a mask so I knew where the filter was to go. I painted over the water area and in 30 seconds I had clear crisper water. I was amazed! A quick stroke of the brush is all it took to make the water feature better in the photo. I did the same with the “Cloudy Sky Definition” brush and instantly got a crisper sky and was impressed that the brush did not take anything away from the area of fog that was in the photo. In fact, it made the fog stand out just that much more! Not bad for first test!

Editing
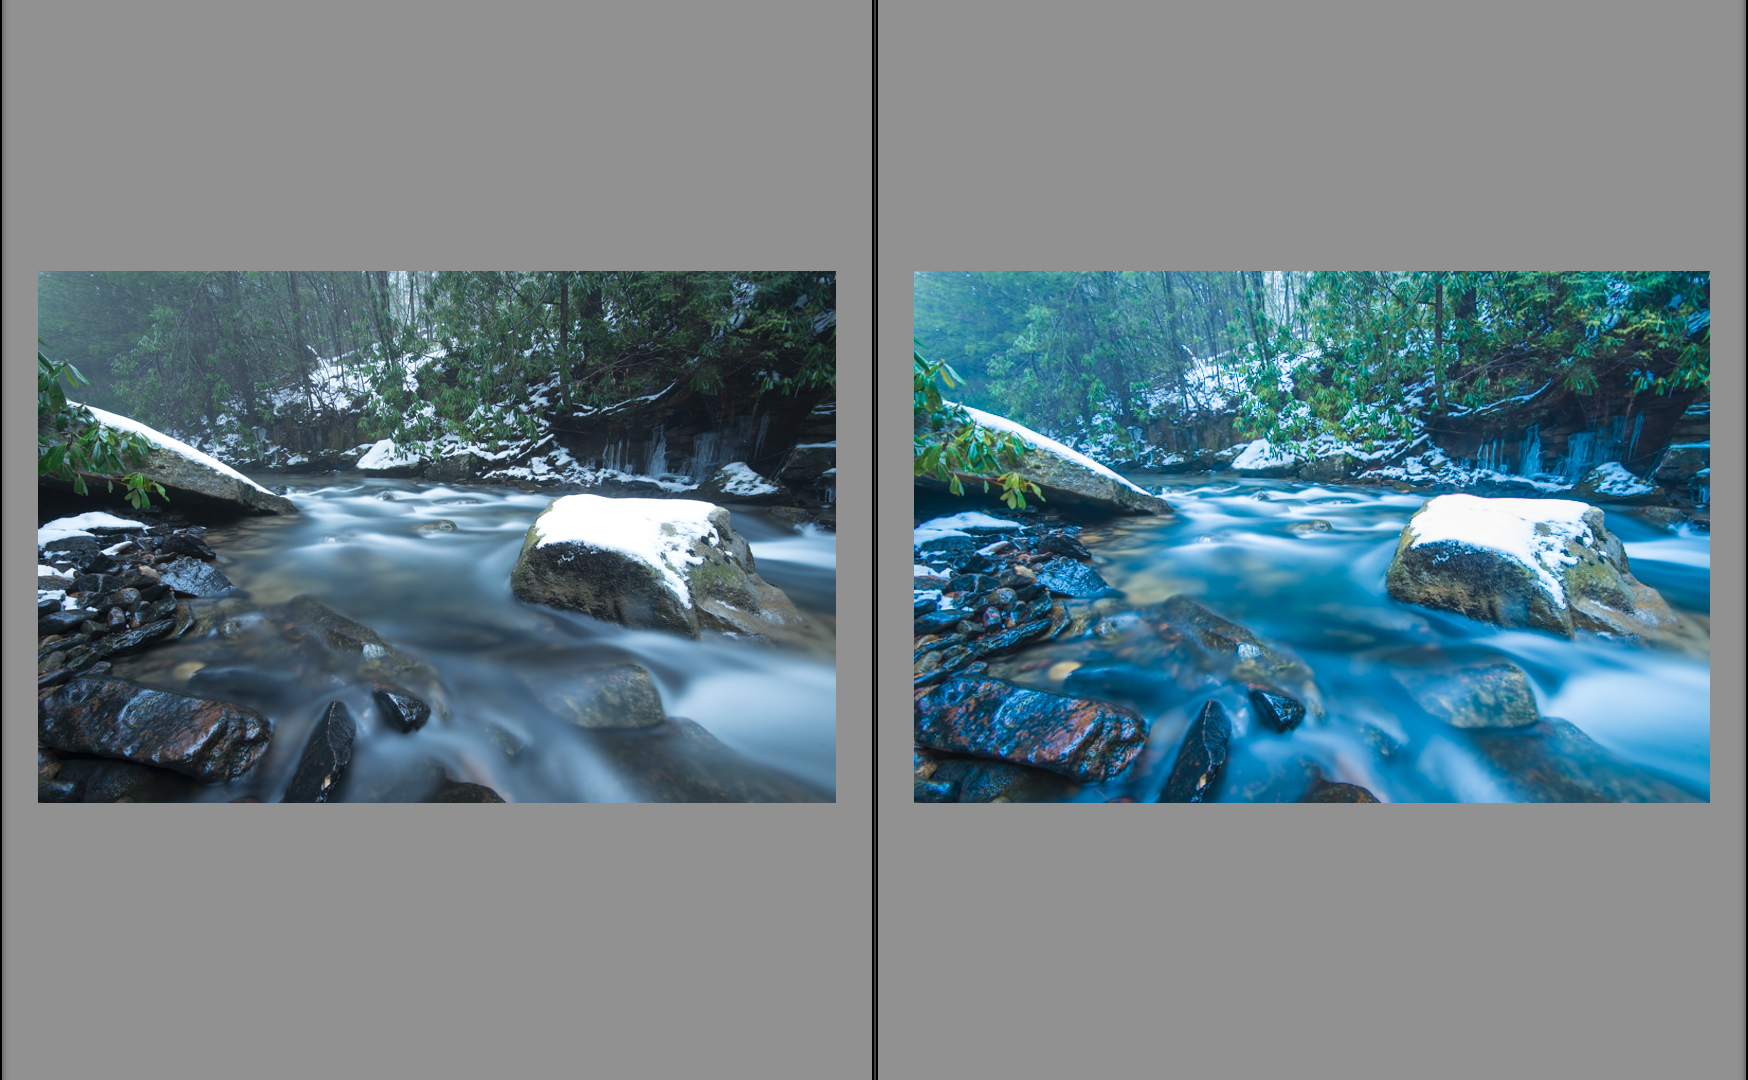
After the quick edits, I wanted to see what more these presets could do. I took a favorite photo from my last adventure and used these presets instead of my normal editing process. Looking at the presets I noticed they had a system with different selections that you can go through and use to edit different components of the photo. There is also an all-in-one with different presets. 1-Base, 2-Exposure, 3-Color, 4-Tone, 5-Polish, 6-Vignette. I added the following presets to edit the following photo. 1-Dance in the Rain, 3-Reduce Green, 4-Color Pop, 5-Add Contrast.

This is using the All-in-One Pastel Caress. I really liked this one for the soft color it provided.

Below is the same photograph that I manually edited.

So the preset isn’t bad at all! I like the many options available to refine your photo. I think these are very good starting points for editing. I also think these are excellent places for beginner photographer to learn what they like and what they don’t like when it comes to style. I would encourage anyone to try these out. Presets aren’t something I’ll use all the time but I will continue to use these in some of my workflows.
If you want to check out more of their presets, head over to their website and check out their Lightroom presets, SleekLens Lightroom. If you want to check out the “Through the Woods” presets, you can grab them SleekLens – Through the Woods.
DISCLAIMER: SleekLens did provide me with the “Through the Woods” presets for this review.